 Scribba
Drawing a believable 3D object on flat paper is hard when you're guessing the angles. Isometric paper takes the guessing out. The guide lines already run in the three directions a 3D drawing needs, so a cube, a machine part or a crystal's unit cell comes out looking right on the first try, even if you've never taken a drawing class.
This guide explains how isometric drawing works, walks through the basic techniques, and covers the two classes where students use it most: engineering graphics and chemistry. Then it shows how to set it up in Scribba.
How isometric drawing works
In an isometric drawing, the three edges that meet at the front corner of a box are drawn at equal angles to each other, 120° apart. In practice that means:
- Heights stay vertical.
- Widths and depths run at 30° above horizontal, one going left and one going right.
Because all three directions are treated equally, lengths along them are drawn to the same scale. A 2 cm edge is the same length whether it's height, width or depth. That's what makes isometric drawings useful for technical work: you can measure from them, unlike a perspective sketch where far things shrink. (If you want things to shrink with distance, you want perspective paper instead.)
Isometric dots or isometric grid?
Both give you the same three directions. The difference is how much the paper shows.
- Isometric dots are quieter. The dots mark where lines can go without drawing them, so your finished sketch stands out cleanly. Good for final drawings and for pages that mix sketches with notes.
- Isometric grid shows every guide line. It's easier when you're learning, or when a drawing has lots of edges you need to count along.
A common habit is to learn on the grid and switch to dots once the angles feel natural.
Drawing a box, step by step
Nearly every isometric drawing starts as a box. Get this right and everything else follows.
- Mark the front corner near the middle of the page.
- Draw the vertical edge up from it for the height.
- Draw the two bottom edges along the 30° lines, one left for width and one right for depth.
- Draw verticals up from the ends of those edges.
- Close the top with lines parallel to the bottom edges.
Every line in the box is either vertical or parallel to one of the two slanted directions. If a line isn't, something has gone wrong.
The boxing method for real objects
For anything more complex, like an L-bracket, a stepped block or a house, draw the overall bounding box lightly first. Then carve away the parts that aren't there, counting grid units for each cut. Finally, trace the real edges darker.
A few conventions make technical sketches easier to read:
- Light construction lines, dark final edges. Sketch the box in a light color or a thin pencil, then go over the visible edges in a darker, thicker pen.
- Hidden edges as dashes. If your instructor wants them, draw edges behind the object as short dashed lines.
- Circles become ellipses. A hole on the top face of a block appears as an ellipse in isometric view. Sketch a small isometric square (a rhombus) where the hole goes, then fit an ellipse that touches the middle of each side.
- Shade by face. Give the top, left and right faces three different tones. Even a rough shade makes the shape read instantly.
For more on engineering sketching, including orthographic views, see engineering notes on iPad.
Crystal structures and unit cells
Chemistry and materials science classes ask you to draw unit cells, and isometric paper is the easiest way to get a cube that looks like a cube.
- Simple cubic: draw the cube, then an atom at each of the eight corners.
- Body-centered cubic: the same cube, plus one atom at the center. Finding the center is easy on isometric paper: it sits where the diagonals between opposite corners would cross.
- Face-centered cubic: the cube's corners, plus one atom in the middle of each of the six faces.
Draw the cube edges first, then the atoms, using a different color for atoms that sit in different positions. When you count atoms per unit cell, remember that a corner atom is shared among eight cells and a face atom between two. Writing those fractions next to each atom on your drawing is a good way to make the counting stick.
Tip: draw atoms on the back faces slightly smaller or lighter than those in front. It makes the drawing much easier to read without true perspective.
Isometric paper in Scribba
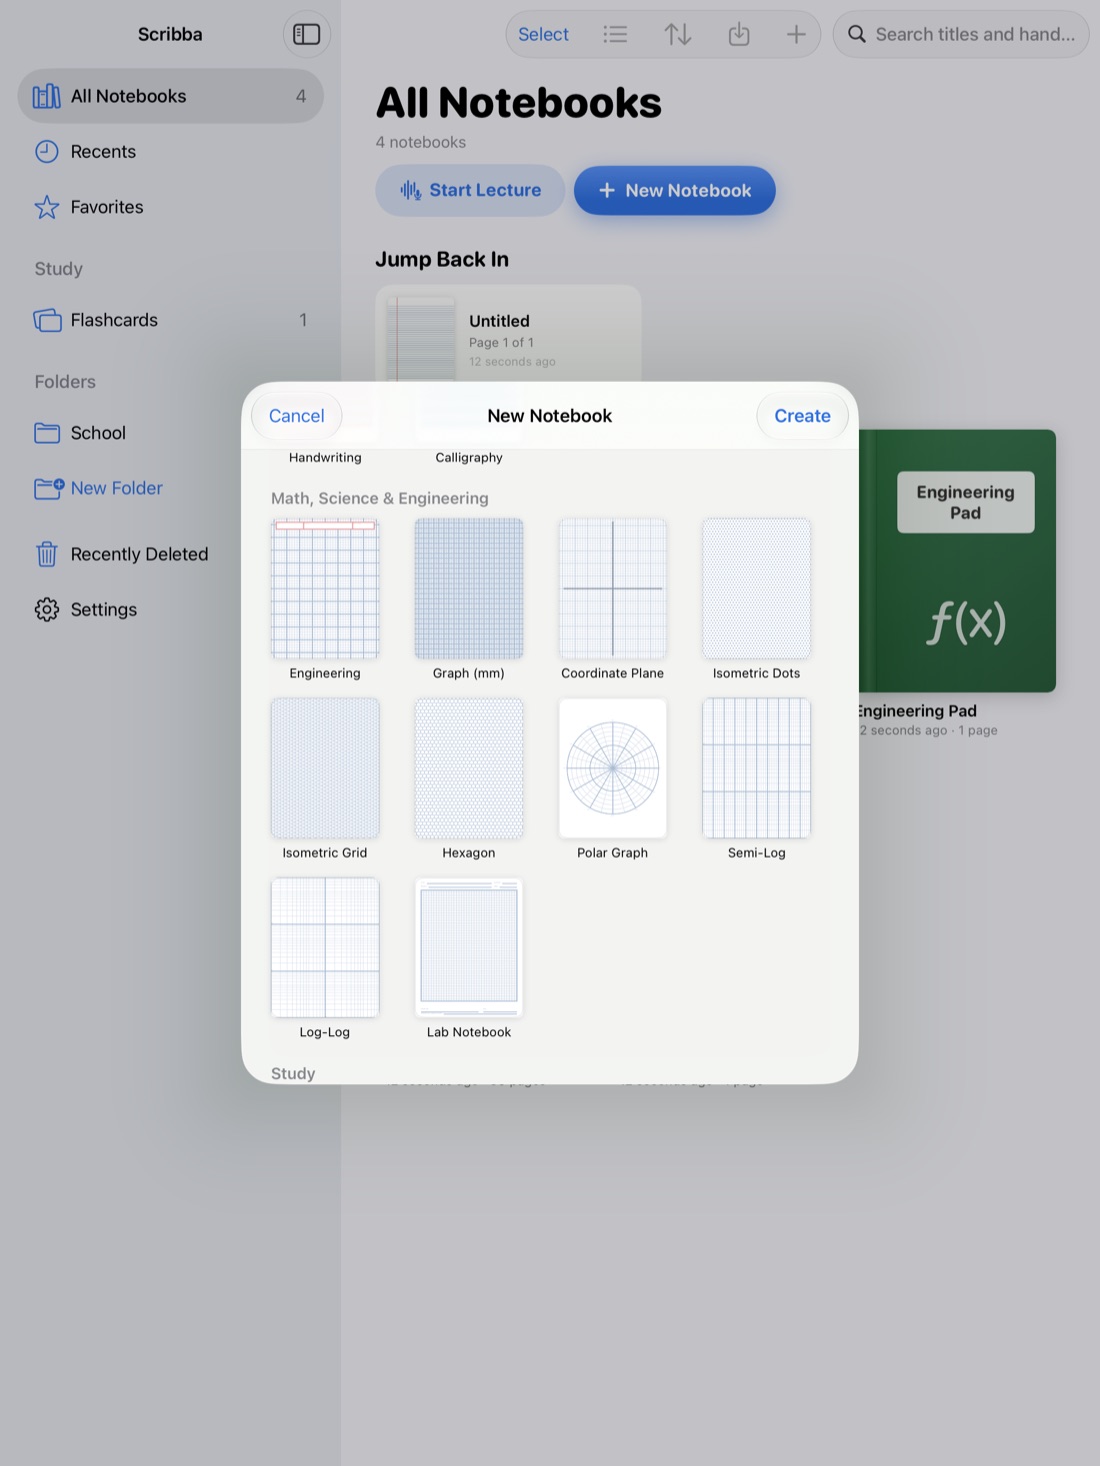
Scribba has both papers, Isometric Dots and Isometric Grid, in the Math, Science & Engineering section of the paper picker. You can change any page to either one from the page sidebar, so a lecture page can become a sketch page the moment your professor starts drawing on the board.
Tools that help:
- Snapped straight lines. Hold the Apple Pencil still at the end of a stroke and it snaps into a straight line. Aim along a guide line, hold, and the edge comes out clean. The ruler is there for lines you want to place exactly.
- Ellipses. The same hold-to-snap works for ellipses, which covers holes and cylinders.
- Pens for each job. Of Scribba's six pen types, pencil works well for construction lines and fineliner for final edges. Keep three saved widths per tool for thin, medium and bold.
- Labels without clutter. The Zoom Window lets you write dimensions big in a magnified strip, and they land small and neat beside the edge.
- Hide the answer for practice. Draw a structure, then cover it with study tape and redraw it from memory. Tap the tape to check. More in study tape on iPad.
For other papers built for science and math, see iPad note paper templates.
Frequently asked questions
Is isometric paper the same as perspective paper?
No. On isometric paper, parallel edges stay parallel and lengths stay to scale. Perspective paper uses vanishing points, so things get smaller with distance. Isometric is better for technical drawings; perspective looks more realistic.
Should I use isometric dots or isometric grid?
Use the grid while you're learning or for drawings with lots of counted edges. Use dots when you want a cleaner finished sketch.
Can Scribba turn my isometric drawing into a 3D model?
No. Scribba is for drawing by hand. Your sketch stays a drawing on the page, which you can export as a PDF or share as an image.