 Scribba
Architecture school mixes several kinds of class in one week. There's studio, where you design and get critiqued. There are history and theory lectures, which work much like any lecture course. There are structures and building technology classes, closer to engineering. And there's a constant stream of sketching: on site, in crits, on the back of whatever's nearby.
Your notes have to handle all of it, and most of them will be drawings. Here's how to set up an iPad notebook that keeps sketches, precedents and feedback together, and where it fits beside the CAD and modeling software your program already uses.
Sketch first, and sketch small
Architects think with a pen. The early sketches in a project are not presentation drawings; they're how you test an idea quickly. A few habits that studio instructors tend to push:
- Draw thumbnails. Small sketches, a few per page, keep you from committing to one idea too early. Draw ten small plans before one large one.
- Make a parti diagram. Reduce the design to its main idea in a few lines: a bar, a courtyard, a ramp wrapping a void. If you can't draw it simply, the idea may not be clear yet.
- Use plan, section and view together. A plan alone hides height. Sketch a quick section through the space whenever you sketch a plan.
- Annotate as you draw. Arrows for circulation, sun path, views and wind. Short notes like "entry too hidden?" are part of the drawing.
- Date every page. Your sketchbook becomes a record of how the project developed, and many instructors want to see that process at reviews.
Thumbnails and parti diagrams have a lot in common with visual note-taking; see sketchnotes on iPad for more on thinking in quick drawings.
Study precedents, not just pictures of them
A precedent study looks at an existing building to understand how it works. Collecting photos is the easy part; the learning comes from redrawing. When you study a precedent, draw it yourself:
- Plan: trace or redraw the main floor plan. Note the entry, the main spaces and how they connect.
- Section: draw a cut through the most important space, so you understand height, light and structure.
- Circulation: overlay the routes people take, in one color.
- Structure: mark the grid, the bearing walls or columns, in another color.
- Light and material: where daylight enters, what surfaces it hits.
- Your takeaway: one sentence on what you'd borrow for your own project.
Redrawing forces you to notice things a photo hides. A plan you've traced once stays with you.
In Scribba, add a photo of the building or of a published plan to a page from your camera or photo library, then draw over it. Move and resize the photo so there's room for your diagrams beside it. Use one color for circulation and another for structure, and keep them as saved colors so they stay the same across every precedent you study. See color coding notes for picking a system.
Tip: bookmark each precedent by name in the page sidebar. The bookmarks become the notebook's table of contents, so your precedent library is a list you can scroll during desk crits.
Choose paper for each kind of drawing
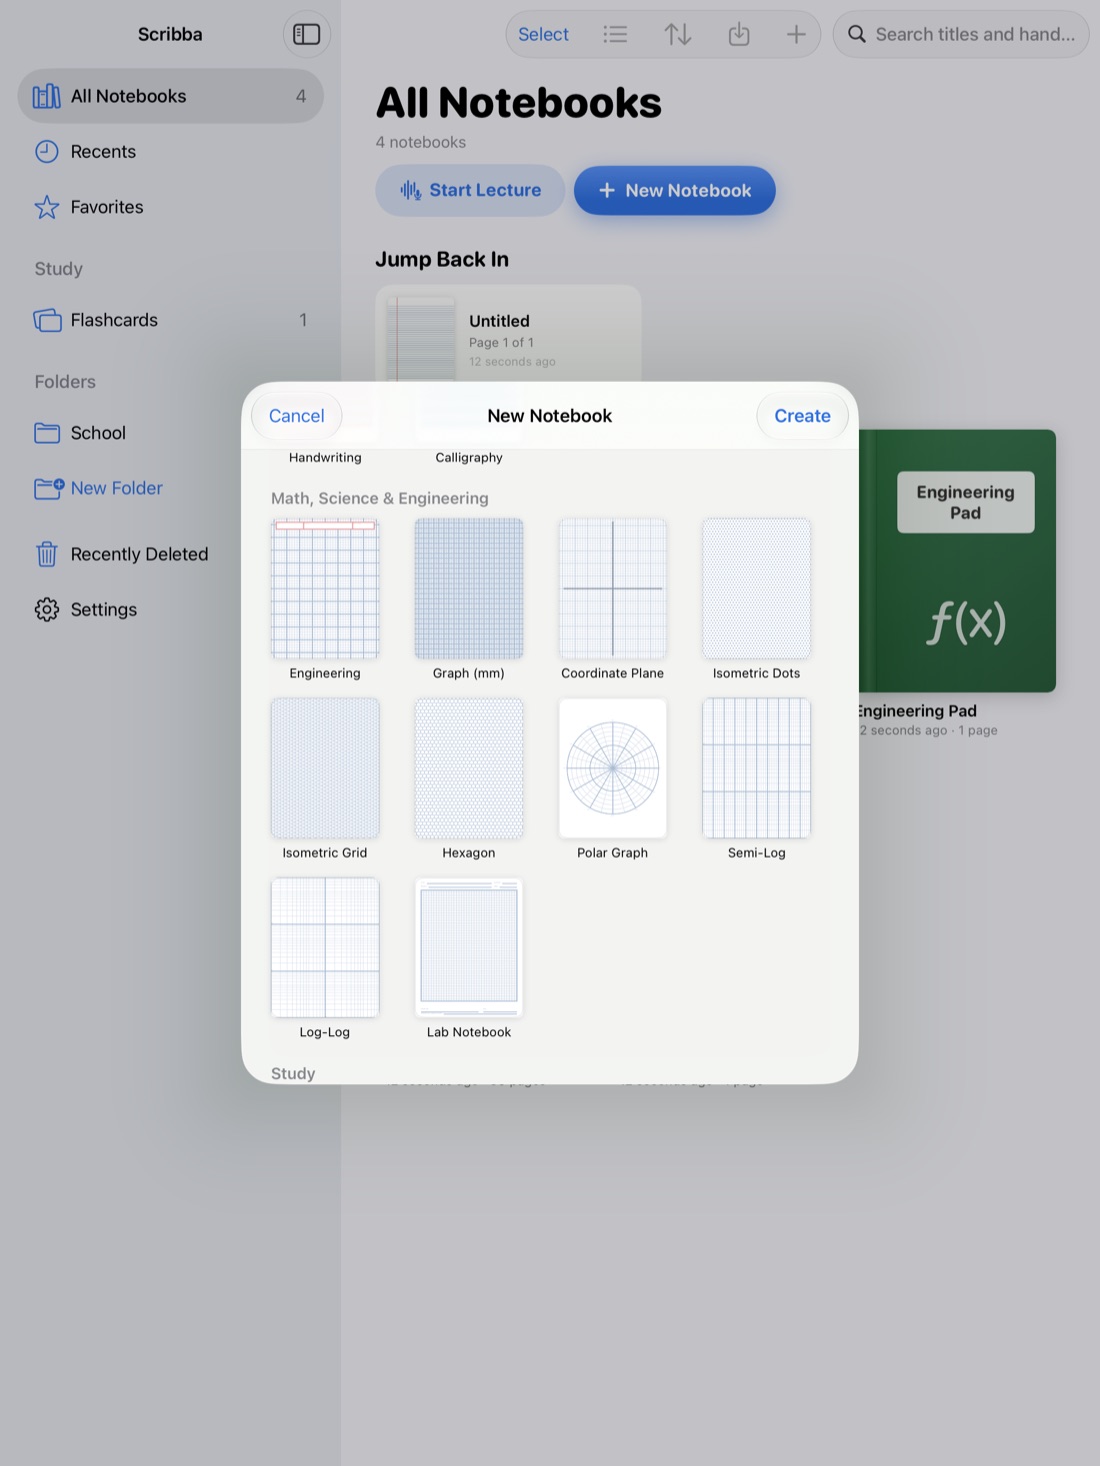
Different drawings want different paper underneath. In Scribba, paper type and color change per page from the page sidebar, so one notebook can switch between them as the work does. Orientation and page size are chosen when you create the notebook; a landscape notebook gives wide sections and site plans more room.
- Blank for loose sketches and thumbnails, where a grid would just get in the way.
- Dot grid for quick plans with rough proportions. The dots guide you without boxing you in.
- Graph (mm) for drawing to scale. The millimeter grid is bolder every 5 mm and every centimeter and runs edge to edge, so you can pick a scale and count squares.
- Isometric grid or isometric dots for axonometric-style views of massing, exploded assemblies and quick 3D studies. Every edge runs along a grid line, so boxes come out true without vanishing points. See isometric paper on iPad.
- Perspective for eye-level views of a space. Scribba's Perspective paper is set up for two-point perspective, with a HORIZON line and guide rays from two vanishing points. See two-point perspective on iPad for the method.
Isometric is better for explaining how a building goes together; perspective is better for showing what it feels like to stand in it. Many design reviews want both.
Draw clean lines without fighting the iPad
Freehand sketches should stay loose, but some drawings need straight walls. In Scribba, hold the Apple Pencil still at the end of a stroke and it snaps into a straight line, rectangle, circle, ellipse or polygon. For long lines you want to place exactly, open the ruler from the + menu in the notebook's top bar and draw along it.
Pen choice matters too. The pencil pen type suits construction lines and early sketches. The fineliner gives crisp final lines. A thicker line for cut walls and a thinner one for things seen beyond is a convention worth keeping even in sketches; set it with each pen's thickness, and save the widths you use. The pen types guide covers thickness, pressure and stabilization.
Take notes in crits and pinups
Critiques move fast, and the feedback is the most useful thing you'll hear all week. Write it down, or you'll remember only the part that stung.
- Write feedback next to the drawing it's about. Add a photo of your pinned-up boards to a page and write comments around it.
- Separate what was said from what you'll do. A short "next steps" list at the bottom of the page turns comments into a plan.
- Note comments on classmates' projects too. Reviewers often repeat the same advice, and it may apply to your project.
If your instructor allows it, recording a review in Scribba links each stroke you write to that moment, so tapping a note replays the comment. Ask first, and ask classmates when it's their review. See is it OK to record lectures?
Lectures, structures and site visits
History and theory lectures work like any image-heavy lecture course: note each building, its architect, date and the idea it stands for. Structures courses are closer to engineering, with free-body diagrams and units; the engineering notes guide covers that setup. On site visits, take photos and add them to pages in your site notebook, then sketch over them while you're still there.
Where Scribba fits
Scribba is a notes app, not CAD or modeling software. It doesn't do scale drawings for you, measure, or export to drawing formats. It's the sketchbook and notebook beside those tools: ideas, precedents, feedback and lecture notes in one place, searchable later. Export a notebook or selected pages as a PDF when you want to include process sketches in a review or portfolio.
Frequently asked questions
Can I replace CAD with iPad sketches?
No. Hand sketches are for thinking and communicating early ideas. Use your program's CAD and modeling software for drawings you'll submit to scale.
Which paper is best for drawing a floor plan to scale?
Graph (mm) paper. Pick a scale, like one square for a set distance, and count squares as you draw.
Should I use isometric or perspective paper?
Isometric for explaining how a building is assembled, perspective for showing what a space looks like from a person's eye level.